Hi All.
Just a very quikie, no pics.
To Let everyone know Guiding Light splashed April 7th 2014, at 14.45hrs wow, had a birthday party afterwards wow, have a hangover now, wow
Roy
PS boat is still floating today, wow
Tuesday, April 8, 2014
Thursday, April 3, 2014
Work Progress 7
Hi Again All,
So work is getting done, some quicker than expected and some slower, but everyday I am having at least 1 success and the light at the end of the tunnel is getting closer all the time.
Some more pic's then.

The 2 main sheet winches had to come off to finish the deck seams on both side,


Then after they had both been refitted sealing the teak on the covering board and toe-rail could be finished off


 Then the big move out could begin, first out the shed was the Mast

Then the boat came out, this was all happened on Monday 31st


So as of today the 3rd April Mast has been finished and fully rigged with standing and running rigging, it is ready for putting in the boat.
Last 2 days I have been fighting the drywood termites who have just had a queen and king launching with clouds of the wee beasties. Always at dusk as the sunset dies, there's me running around the deck armed with the most powerful spray known to man squirting them or as many as I could find, SCARY
More coming
Roy
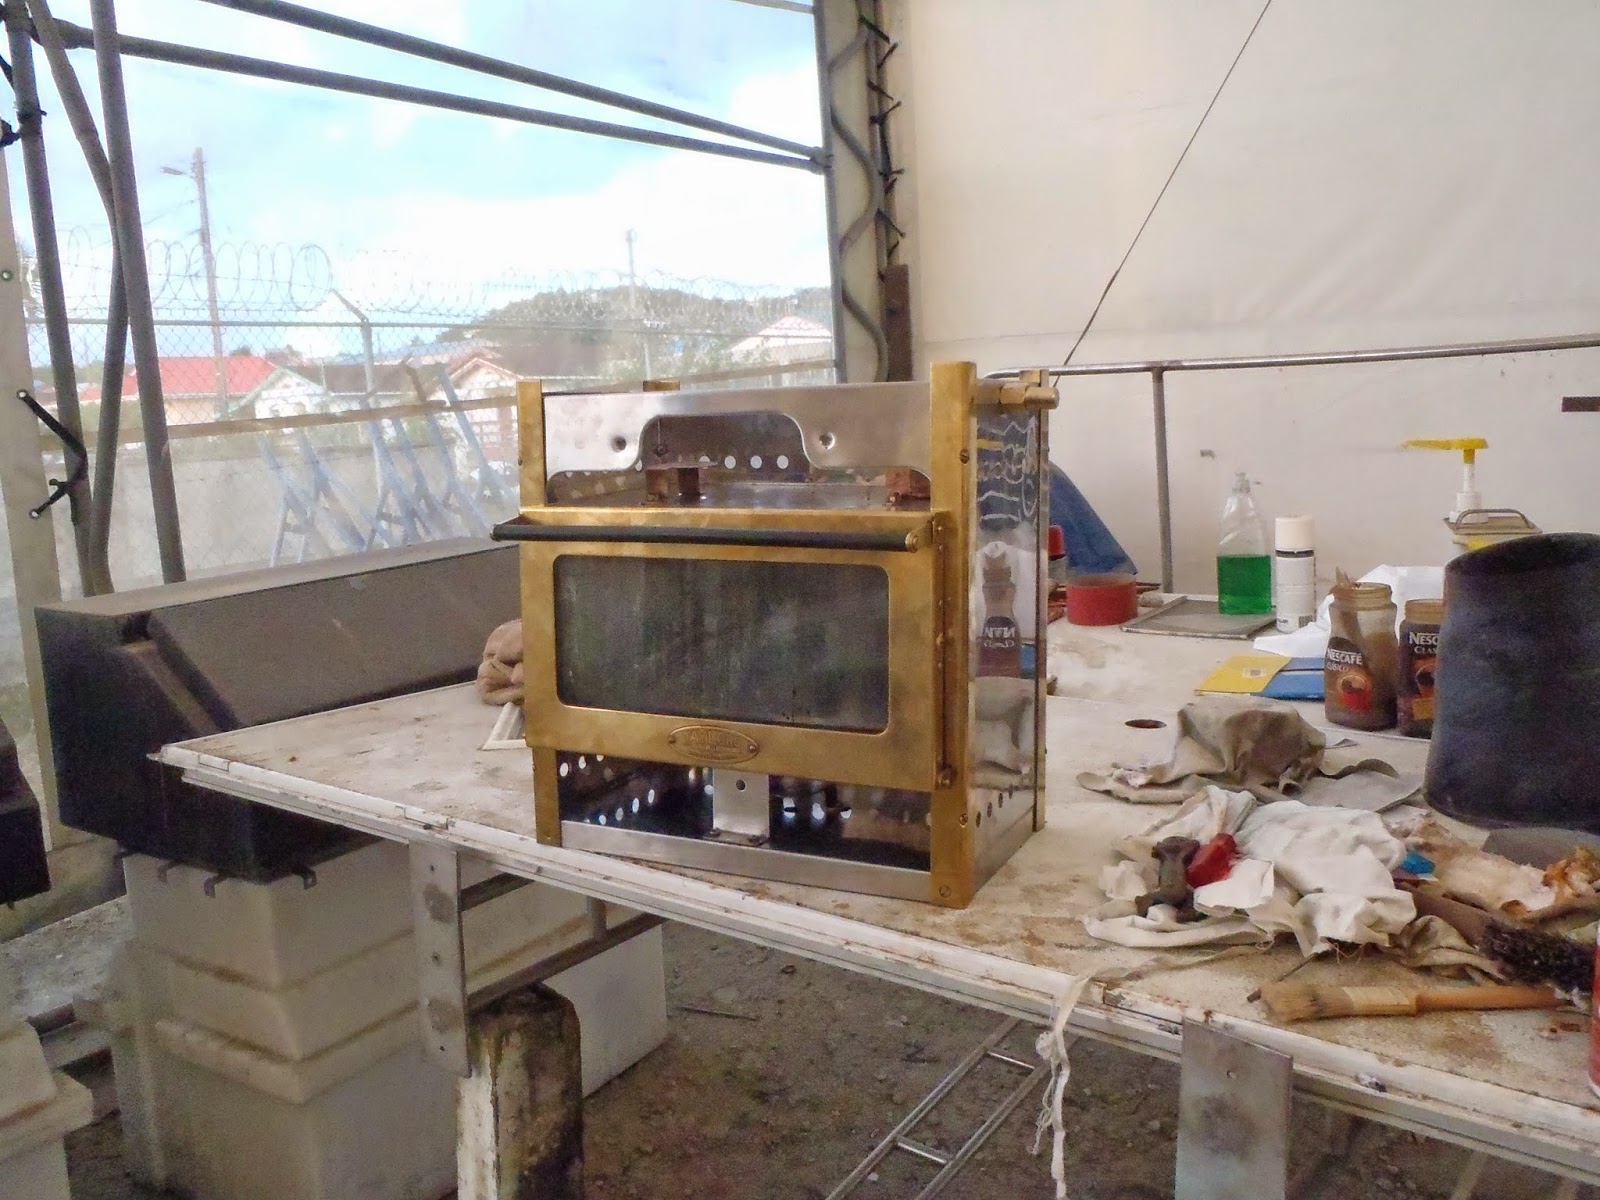
P.S. Oh by the way I finally started the stove, its not finished yet, But, it doesn't look so neglected anymore

 Roy
Roy
So work is getting done, some quicker than expected and some slower, but everyday I am having at least 1 success and the light at the end of the tunnel is getting closer all the time.
Some more pic's then.
The 2 main sheet winches had to come off to finish the deck seams on both side,
Then after they had both been refitted sealing the teak on the covering board and toe-rail could be finished off
Then the boat came out, this was all happened on Monday 31st
So as of today the 3rd April Mast has been finished and fully rigged with standing and running rigging, it is ready for putting in the boat.
Last 2 days I have been fighting the drywood termites who have just had a queen and king launching with clouds of the wee beasties. Always at dusk as the sunset dies, there's me running around the deck armed with the most powerful spray known to man squirting them or as many as I could find, SCARY
More coming
Roy
P.S. Oh by the way I finally started the stove, its not finished yet, But, it doesn't look so neglected anymore
Monday, March 24, 2014
work progress 6
Hi Everyone,
So here are the next pile of photos, I had such a good connection they were posted full res.
As the work continued during the cabin repairs these are the pics of what was going on at the same time.
The tiller and tiller head were also going through the sanding and coats of varnish, 2 views of that.


The mast had also been moved and work began on that, painting and making sure there was no damage to the furniture.

Both deck flood and steaming lamp were gone and replaced them, what annoyed me most was someone stole the VHF arial and mounting bracket so had to buy a new one, also the all round white light had been smashed off the mast top, a new one of those as well has been fitted.

And the mast has to go through the deck,and as that has leaked for 20 years I've had the boat, had to do a repair and mod to the seal
All varnished and any holes filled, plate hides all the old holes and damage that has been repaired.
As I was doing seam 3 on deck I thought I would repair the outer jib sheet lead as well and to my horror the wood had disappeared and no longer there, just a hole, So has to repair that which was a 3 day delay to everything else that was going on.


And the boom was started, this time finally I am changing the colour to one that does'nt come off on everything.

The mast you will note is getting a quick varnish as well!!
So with that amazing Mega Post you all will be up to date with last weeks work, and yes! there is already a pile more gone on since then.
So back on track after the deck repair and I'll post again soon.
Time is marching on and I will need the stove soon it looks a bit sad and neglected doesn't it

Roy
So here are the next pile of photos, I had such a good connection they were posted full res.
As the work continued during the cabin repairs these are the pics of what was going on at the same time.
 |
| first seam caulked on deck |
The mast had also been moved and work began on that, painting and making sure there was no damage to the furniture.
Both deck flood and steaming lamp were gone and replaced them, what annoyed me most was someone stole the VHF arial and mounting bracket so had to buy a new one, also the all round white light had been smashed off the mast top, a new one of those as well has been fitted.
And the mast has to go through the deck,and as that has leaked for 20 years I've had the boat, had to do a repair and mod to the seal
 |
| New seal to fit after mast goes in |
All varnished and any holes filled, plate hides all the old holes and damage that has been repaired.
 |
| seam three |
As I was doing seam 3 on deck I thought I would repair the outer jib sheet lead as well and to my horror the wood had disappeared and no longer there, just a hole, So has to repair that which was a 3 day delay to everything else that was going on.
 |
| hole |
the beam underneath had been worn away too, so repair included that as well
 |
| old bits and new bit ready for a fitting |
while this was happening I was repairing the aft hatch and sanding and varnishing that which became finished.
The next pics are of the repair to deck.
And next pics are of the rest of the deck being caulked once that repair was finished. You know its making me tied just looking at these pics and remembering the work.
But that is now done as well. During which the nav light boxes were getting a bit of TLC with a nice varnish.
And the boom was started, this time finally I am changing the colour to one that does'nt come off on everything.
The mast you will note is getting a quick varnish as well!!
So with that amazing Mega Post you all will be up to date with last weeks work, and yes! there is already a pile more gone on since then.
So back on track after the deck repair and I'll post again soon.
Time is marching on and I will need the stove soon it looks a bit sad and neglected doesn't it
Roy
Wednesday, March 12, 2014
5 th post
Hi Everyone,
OK have internet again and this is the best yet, Told you about the coach roof here are the pics
Work continues and more pics have already been taken and as I now have an internet source close to the boat comms could get much better
Roy
OK have internet again and this is the best yet, Told you about the coach roof here are the pics
 |
| pic 1 finished coachroof |
 |
| Pic 2 finish views |
 |
| pic 5 finish views |
 |
| First seam on deck repairs |
 |
| 2nd seam on deck |
Roy
Wednesday, February 26, 2014
Work progress 4
Hi Everyone here is latest news
First pic is of bunk bottom boards, they were so bad I have had to do them as well before I ordered the cushions to be fixed, as well as doing all the other jobs

 Second pic is of them all varnished and screwed back down in fore cabin. Note the cushions have also been done with new backing material and good quality foam, so all bunks are now available as beds at long long last.
Pic 3 is the first undercoat applied to cabin top Pic 4 is after sanding and filling second coat going on.
Pic 5 is after another 2 coats have been applied with filling and sanding in between, ready for first top coat.
Pic 6 is first top coat
After another 2 topcoats were applied with sanding in between the 3rd topcoat was put on, this time using the last tin of paint I have of the right colour. Of course this means I will not be able to touch up the hull this time, as I only get 2 coats from one tin on the cabin top. The last coat will be put on when all the fittings have been replaced. Pic 7 & 8
I have also been sanding and varnishing all the bits around the boat, Pic 9 is the companionway hatch
Pic 10 is the fore deck mess, note the 2 vents that were ripped off the cabin when I went on the reef, they have to be replaced now
And as I am doing the deck next, Pic 11 is the mast step hole which has to be repaired before I can start re caulking.
So when the vents handrails and coamings have been completed I will post the next set of Pics.
Roy
First pic is of bunk bottom boards, they were so bad I have had to do them as well before I ordered the cushions to be fixed, as well as doing all the other jobs
Pic 3 is the first undercoat applied to cabin top Pic 4 is after sanding and filling second coat going on.
 |
| Pic 3 |
 |
| Pic4 |
 |
| Pic 5 |
Pic 6 is first top coat
 |
| Pic 6 |
 |
| Pic 7 |
 | ||
| Pic 8 |
 |
| Pic 9 |
Pic 10 is the fore deck mess, note the 2 vents that were ripped off the cabin when I went on the reef, they have to be replaced now
 |
| Pic 10 |
And as I am doing the deck next, Pic 11 is the mast step hole which has to be repaired before I can start re caulking.
 |
| Pic 11 |
So when the vents handrails and coamings have been completed I will post the next set of Pics.
Roy
Subscribe to:
Comments (Atom)